Configuring the Wireless Router
Configuring the Wireless Router
Connect to the Router/WAP's Configuration Pages
Now that your Ethernet adapter has the SSID of the WAP and an IP address on the WAP's network, we need to configure it to the settings we want for our wireless network. First, we just need to see if we can contact it at all. To test to see if we have our Ethernet adapter configured to talk with the WAP, let's bring up the WAP's administration pages. Most WAPs and Routers have a built-in mini web site that can be used to check their status and to change their configuration. So to view the WAP's settings, we use a web browser like Internet Explorer or Firefox just like we would use to visit any other web site. The user's guide that came with your WAP will tell you for sure, but typically you get to the WAP's configuration pages by browsing to 192.168.0.1 or 192.168.1.1 into the address bar. Linksys equipment, for example tends to use the "1.1" address. Netgear WAPs, typically use the ".0.1" address instead.
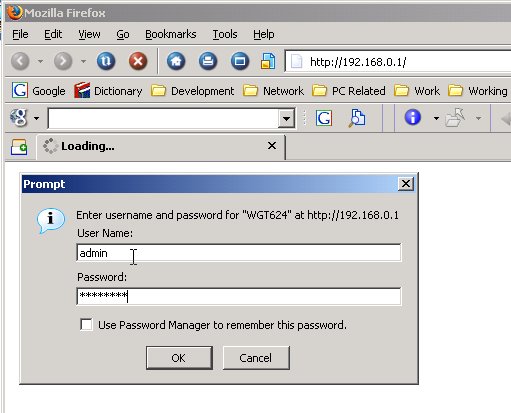
Above is an example of logging in to the Netgear WGT624 router. Note the IP address typed into the address bar as the URL. We can change the LAN IP address of the router if we wish. Notice that a dialog box popped up for us to enter the username and password for the router. By default, the Netgear WGT624's password is "password." (Sometimes, they aren't too imaginative either, so I don't feel so bad.) The default user name is "admin," and I have yet to find a way to change it. On the Linksys WRT54GS router, you get the same dialog box, but Linksys doesn't care what you type into the user name field (including nothing at all). The Netgear router does care. Once we have entered the administration password for the router, you should see the main page of the router configuration like the one below. (The very first time you logon to the router, you may be prompted with a page asking if you want to automatically detect your settings or get an offer to check for upgraded firmware. Decline such pages for now.)
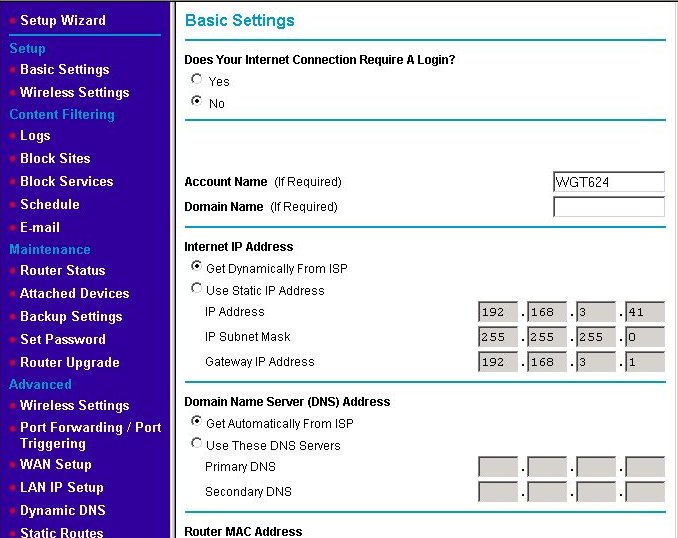
Every router's main page is different, and right now, we're concerned with changing the wireless settings. Therefore, we'll put discussing this page off until later and just click on the Wireless Settings link on the left menubar under the heading Setup. That brings up the basic wireless settings page as discussed in the next section. (Note there is a Wireless Settings Page under the Advanced heading, too.)
Set the WAP's Channel and SSID to Your Desired Choices
If you purchased your WAP and wireless Ethernet adapter from the same manufacturer, the wireless Ethernet adapter will probably be configured with the same defaults for the channel and SSID as the WAP. This means that your laptop or desktop will probably be able to talk to the WAP as soon as you install the software and drivers for the adapter. Even so, you will want to change the defaults.
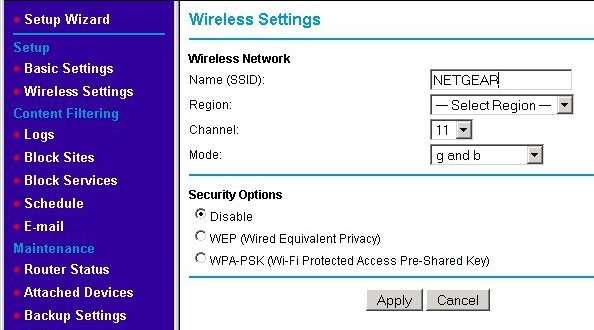
If your wireless Ethernet adapters don't initially have the same channel and SSID as the WAP, you will need to change (at least one of) the adapter(s) to match the WAP at least long enough to change its settings. (See the section Set the Wireless Ethernet Adapter's Channel and SSID to the WAP's Defaults if you haven't done this already.) If you have a combination router/switch/WAP, you can also use a wired connection to the switch to configure the WAP's channel and SSID. Every router's wireless settings screen is different, but they will have a page for setting the SSID. The basic wireless configuration page for the WGT624 is shown below.
In the next screen, I've changed the default SSID from the default ("NETGEAR") to my desired name - Hard2Guess. Please don't use that name. Make up your own. Just make it something you'll easily remember and others aren't likely to use themselves.
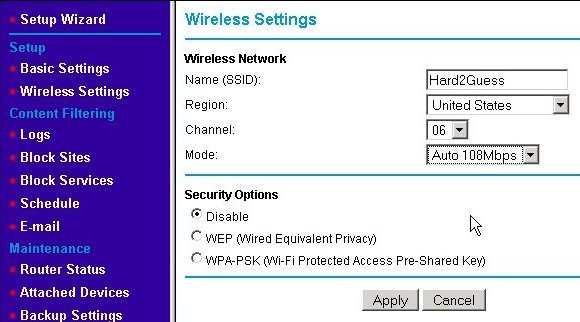
You should also set the region at this time if it is not already set. Setting it to United States defines how many and which exact channels (frequencies) the WAP's radio transceiver can use. (In the case of the US, it's 11 channels.) If you want, you can also pick a specific channel to use. If you aren't getting the range you want or you have a 2.4 GHz cordless phone (or wireless mouse/keyboard or RF remote control or wireless speakers for your home theater or ....) that's interfering with your wireless LAN, changing the channel may help. With this particular router, I changed the mode to "Auto 108Mbps" in order to take advantage of Netgear's proprietary "Super G" 108 Mbps speed. Doing so locks the channel at 6, so I have no choice in this case. We'll leave the security options set to "Disable" for now. Hit the Apply button to make the changes and continue on to the next section.