Changing DHCP Server IP Assignment
Changing the DHCP Server's IP Assignment Range
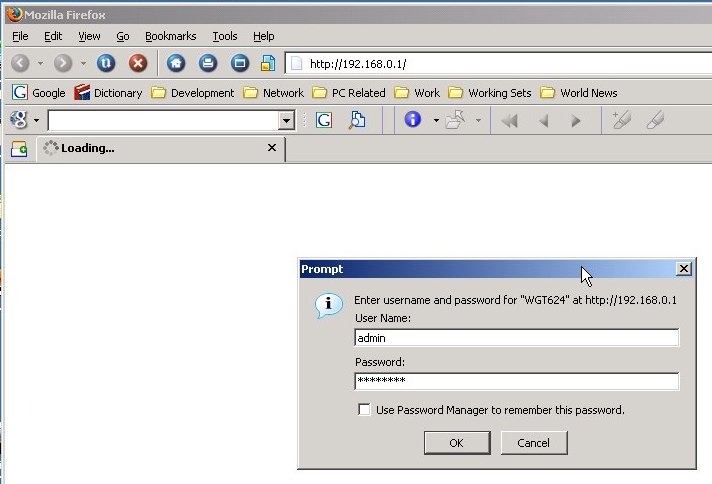
By default (at least in the case of the Netgear WGT624), the full range of LAN IP addresses is given to the control of the DHCP server. That is, all the addresses from 192.169.0.2 through 192.168.0.254 (where 192.168.0.1 is reserved by the router for its LAN IP address) are handed out by the DHCP to clients as they are requested. If we need to reserve some addresses for fixed IP assignment, we need to wrest a few of those away from the DHCP server's control. In order to do that, we need to change the configuration of the DHCP server in our router. As with anything dealing with changing the configuration of the router, first we log in.
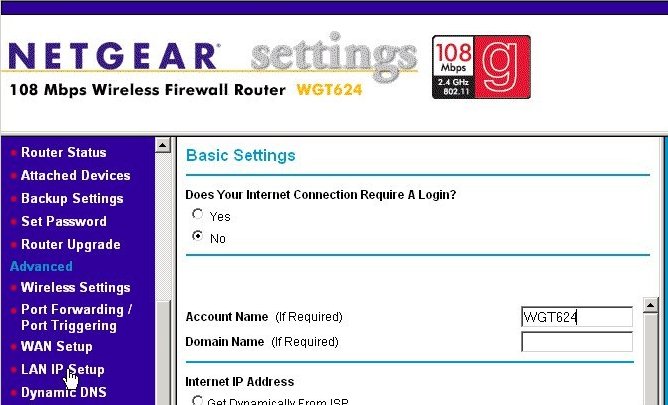
That will bring us to the first (Basic Settings) page. We need to go to the page where the DHCP settings are. On the Netgear WGT624, that is found on the LAN IP Setup page, so we click on that.
The LAN IP Setup page is shown below. We click on the last text box on the Ending IP Address under the Use Router as DHCP Server section, so that we can change the value from 254.
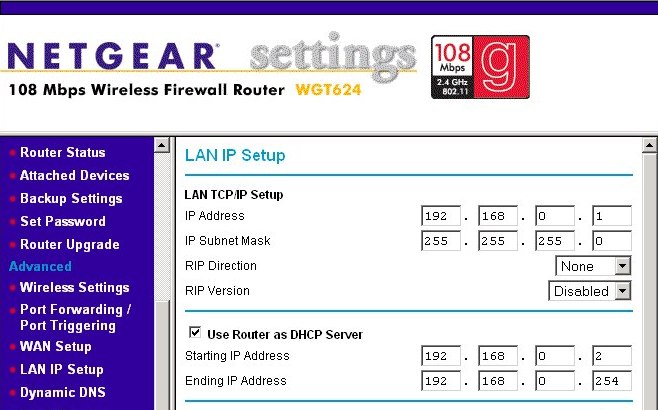
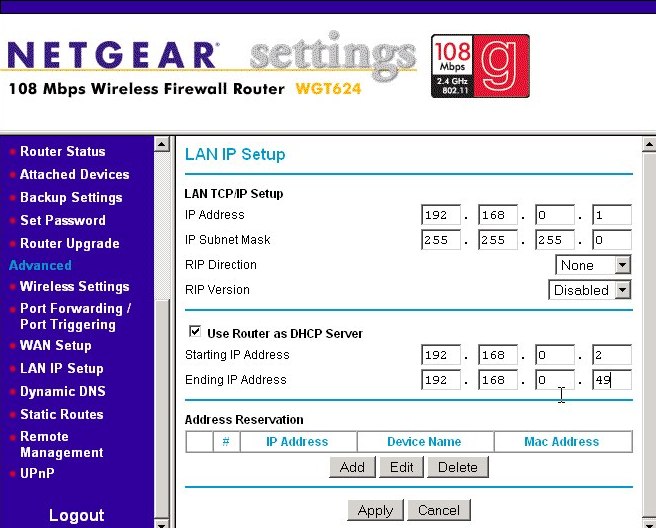
For the example shown below, we change the Ending IP Address to 49. That means your DHCP server will hand out IP addresses from 192.168.0.2 through 192.168.0.49, inclusive or 48 addresses in total. That should be enough for most home networks, but you can always bump it up later. These IP addresses are only given to devices attached that ask for automatic configuration - that is, devices that act as DHCP clients. You'll also notice a setting for the IP Subnet Mask on the page below. That will also be given to your client as well as the Domain Name Server (DNS) Addresses (if any), which on this router are found near the bottom of the Basic Settings page.
When you have the configuration numbers set the way you want, press the Apply button. If the machine you configured the router from happens to also be one of those DHCP clients, an interesting thing may or may not occur at this point. You may loose your connectivity to the network. The basic troubleshooting from Test 4: Checking for a Valid IP Address is to check to see if you have a valid IP address. Sometimes when you are fooling around with the DHCP Server settings and you are a DHCP client, you'll find yourself with no IP address after you apply the change. This state is shown in the first ipconfig command's results below. The situation is (usually) easily recoverable. Just as the DHCP server for a new IP address. Just type in the command ipconfig /renew as shown in the bottom half of the screen below and the DHCP server should give you a new IP address. The renew option will make your machine send out a DHCP request for a new IP.
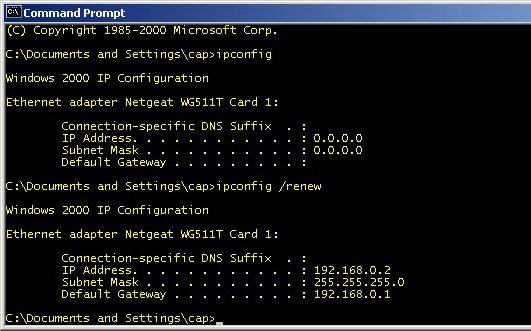
I haven't determined what causes the loss of the IP address you already had, and it doesn't happen every time the DHCP server's settings are changed. (At least, not in my experience.) It's a mystery. Oooh!
- Printer-friendly version
- Log in to post comments